ℹ Air Quality

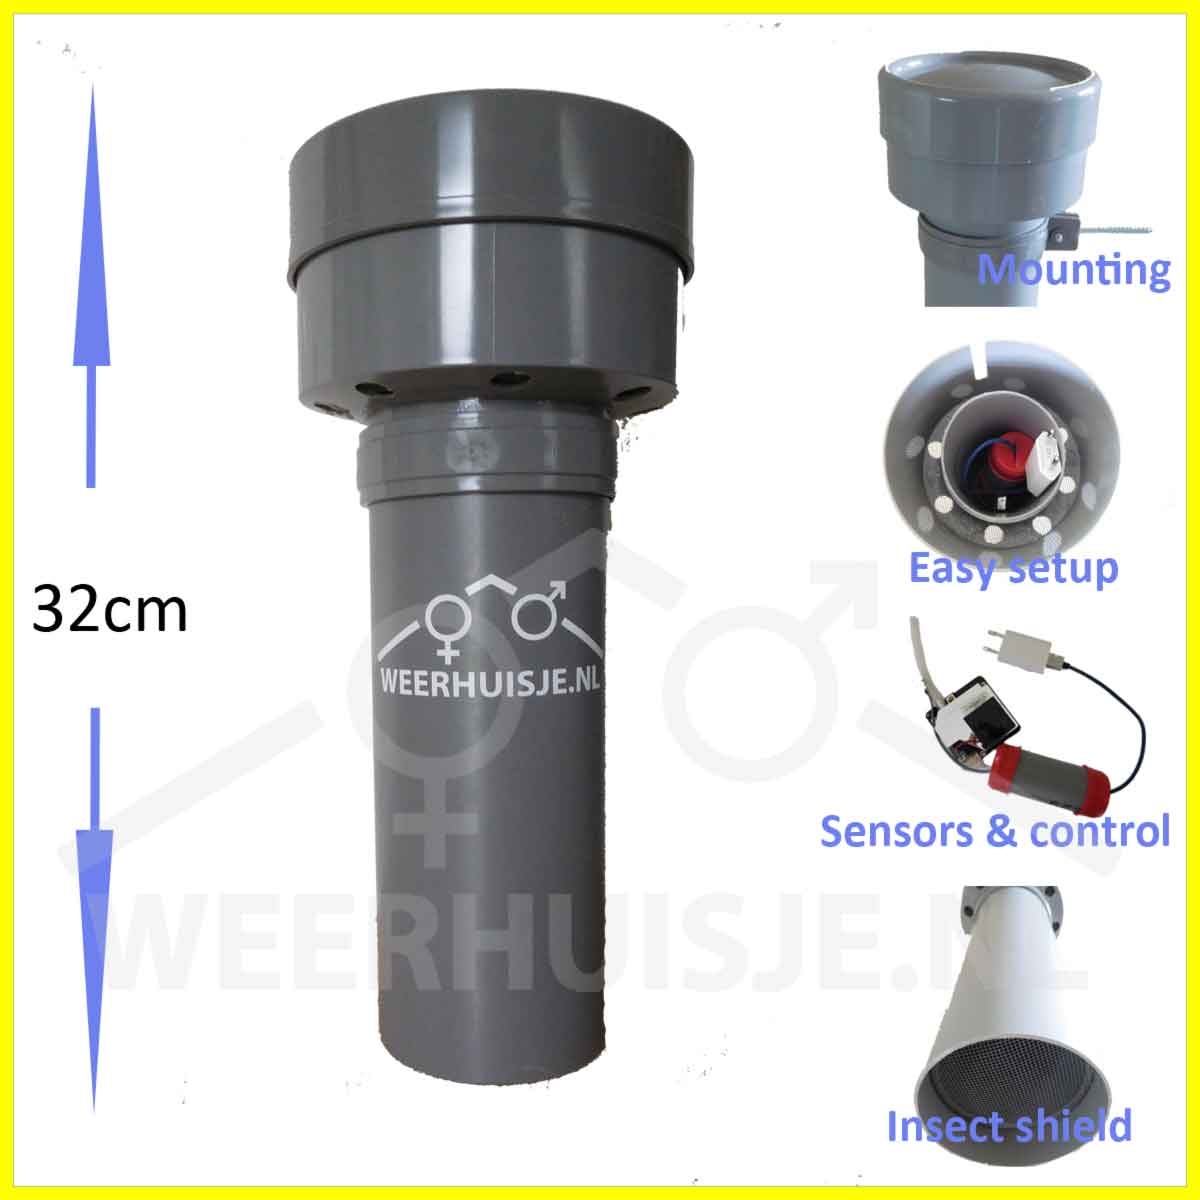
Installation of particulate matter measuring station.
1.1 The Wifi settings have already been preconfigured by Weerhuisje.nl.
- Connect the adapter to the mains. Make sure the WH-FS-01 is within range of your WiFi network. The first observation will be carried out within a few minutes.
- Go to step 1.3 / 1.4.
1.2 The station has still to be connected to your WiFi network.
- Make sure you have a device (smartphone, tablet, PC) connected to your own WiFi network.
- Connect the WH-FS-01 to the mains.
- Watch the video and / or continue with the steps below
- Search on your smartphone, tablet or PC for WiFi network “Feinstaubsensor-1234567 (ID of the sensor).
- Connect to this WiFi network via your smartphone, tablet, PC.
- Ignore any reports that internet will not be available.
- Open a browser on your smartphone, tablet, PC and type in the address bar: 192.168.4.1
- The settings menu of the WH-FS-01 appears. Put in:
- Name (SSID of your own Wi-Fi network), or choose this from the list of found networks.
- Wifi password of your own WiFi network.
- Click: [Save and restart] and wait for 2 minutes.
- Please note:
- If after reboot WiFi network “Feinstaubsensor-xxx" has disappeared, your Fine Dust station has been successfully installed. Data upload start automatically.
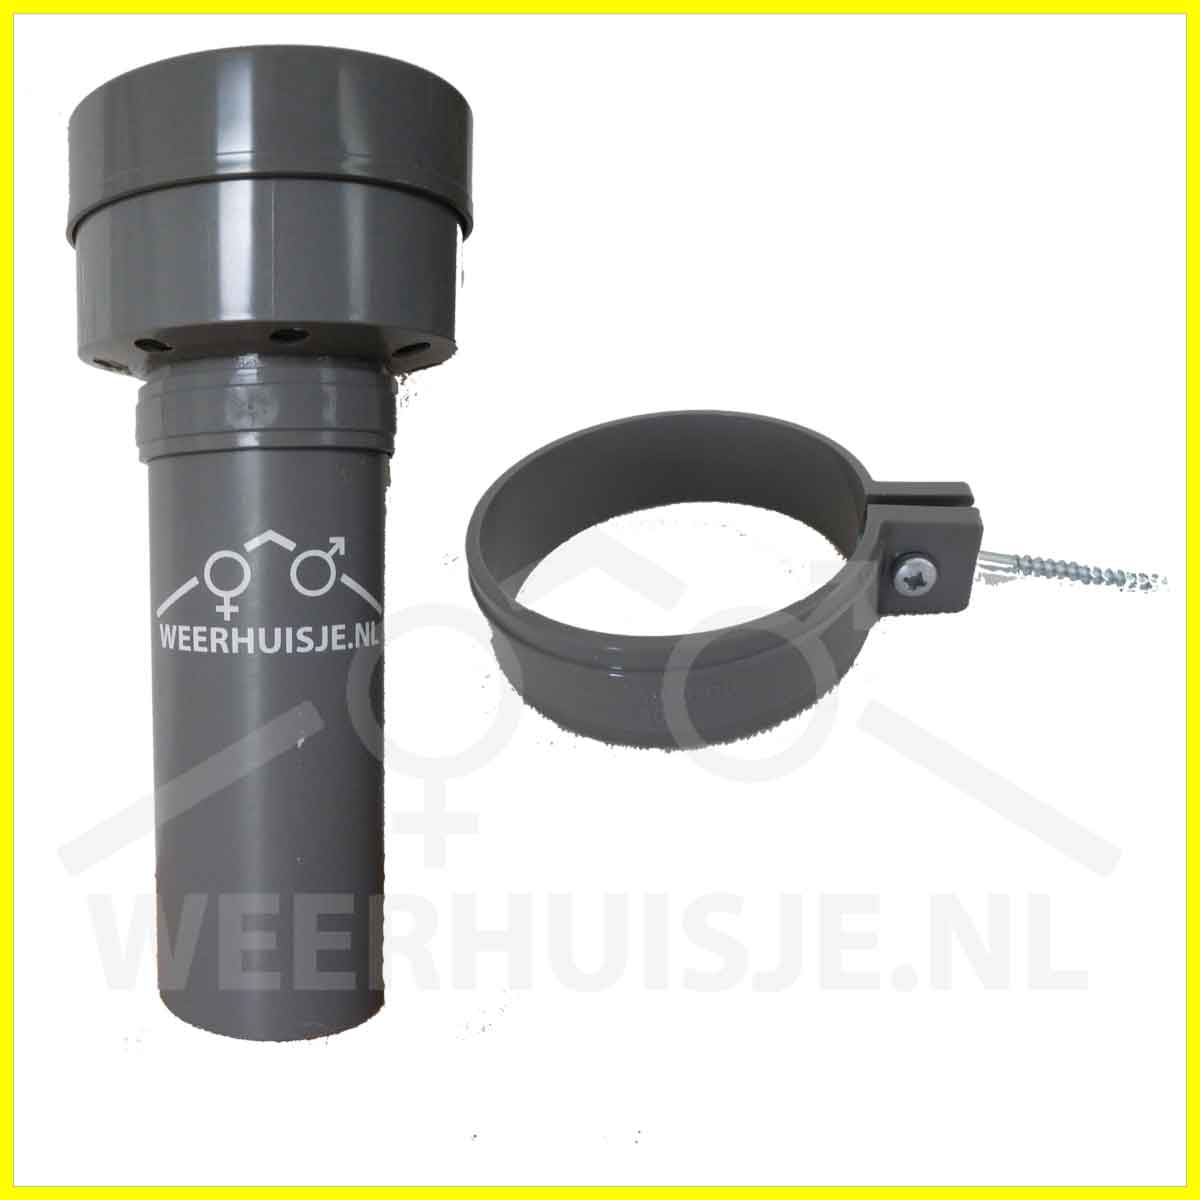
1.3 Mounting of the Tube type fine dust station.
- Check presence of power supply within range of the measuring station.
- Preferably place the station in a (partially) shaded area.
- The particulate matter measuring station transmits the measurements to the Internet via your WiFi network.
- Do a test setup to check if there is enough WiFi reception.
- Ensure free air movement at the bottom of the tube.
- An 8mm plug and screw pin are included for final mounting in stone or wood.
- Turn the screw pin in the plug / wood, but not too far. Mount the bracket with station to the screw pin.
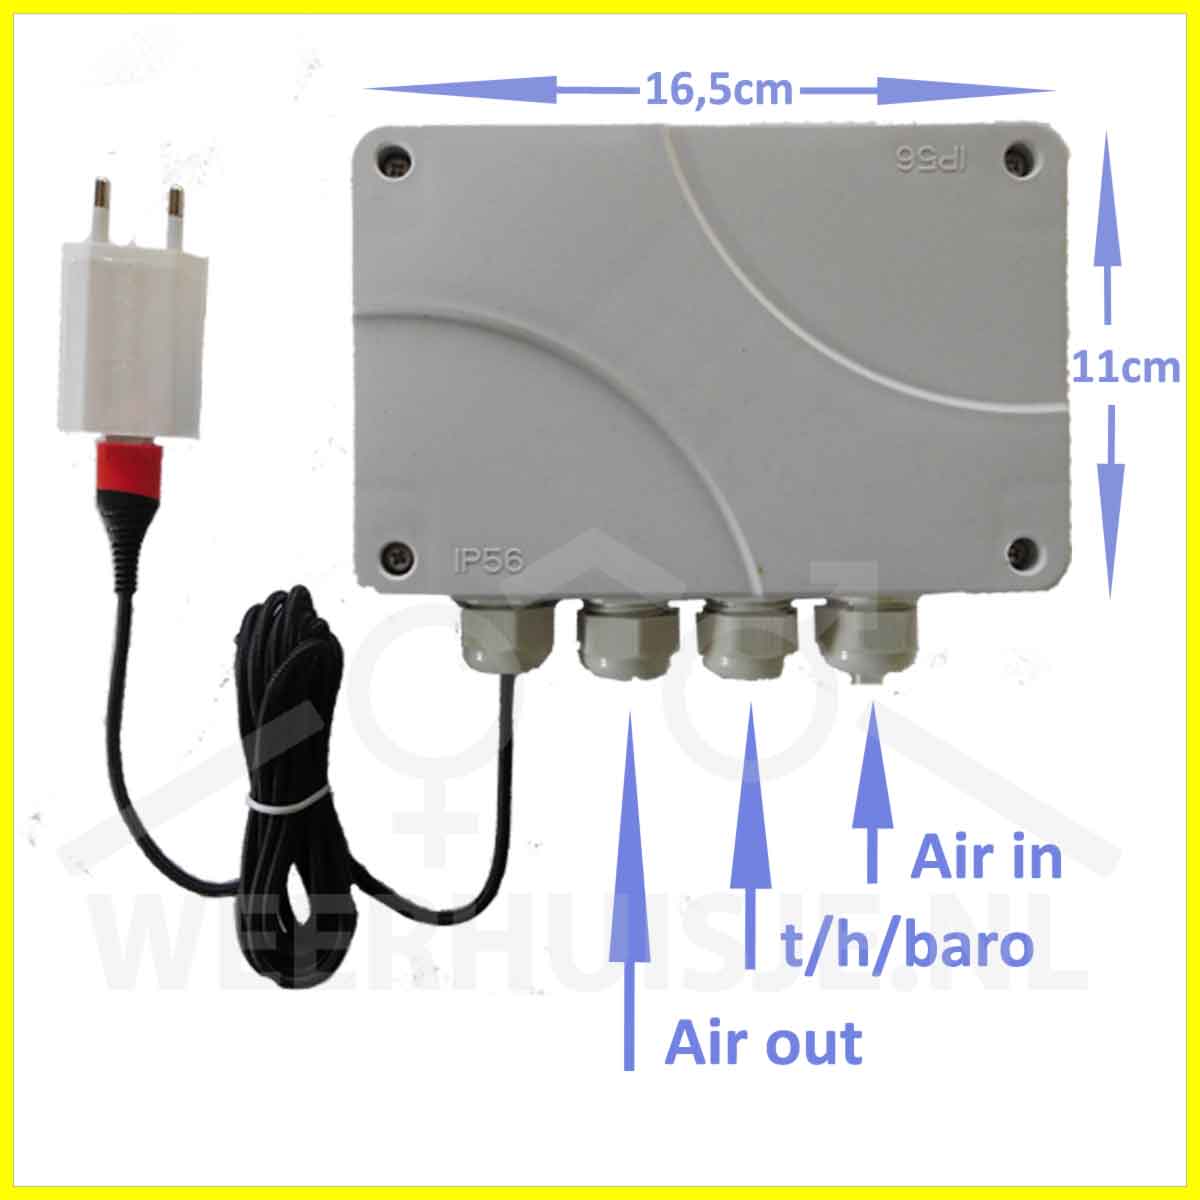
1.4 Mounting of the Box type fine dust station.
- Check presence of power supply within range of the measuring station.
- Place the station in a shaded place.
- The particulate matter measuring station sends the measurements to the Internet via your WiFi network.
- First do a test set-up to check whether there is sufficient WiFi reception.
- Mounting
- Remove the cover by loosening the four screws in the corners.
- A screw can be inserted through the housing at all four corners.
- Make sure the connection caps are pointing down!
- In many cases, two screws will suffice for mounting.
- The station can also be used indoors (mounted or lying down on back side).

2.1 Settings / data of the particulate matter station
Settings and current measurement data can be found in the settings menu of the WH-FS-01.
The video shows the interface.
- Obtain the IP address of your particulate matter sensor (Scan tool or via your router)
- Type the IP address in the address bar of your browser and then click [Enter]
- The settings menu of the fine dust station opens.
- Do not make changes if you do not know what the consequences are.
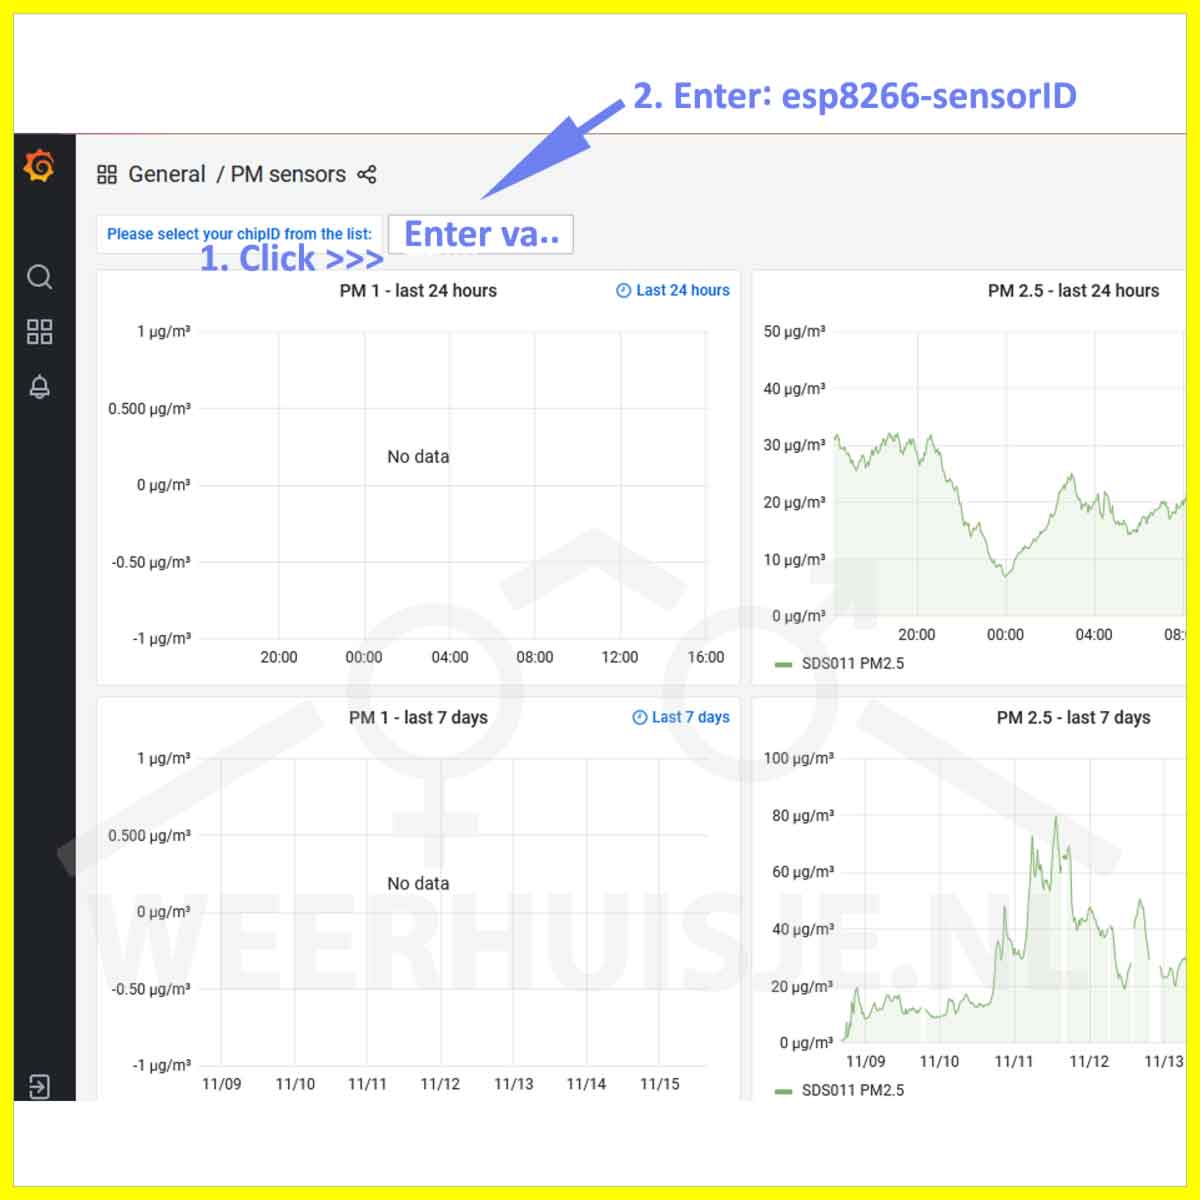
2.2 View your particulate matter measurement data
Your measurement data is sent to the Luftdaten.info server as soon as the particulate matter station is connected to your Wifi network. You can automatically view the measurement data via the graphs below.
- Enter the following line in the address bar of your browser and replace “1234567” with the sensor ID of your own particulate matter sensor (sticker on the housing and on the sensor in the housing):
- https://www.madavi.de/sensor/graph.php?sensor=esp8266-1234567-sds011
- And for the temp / hum / baro graphs:
- https://www.madavi.de/sensor/graph.php?sensor=esp8266-1234567-bme280
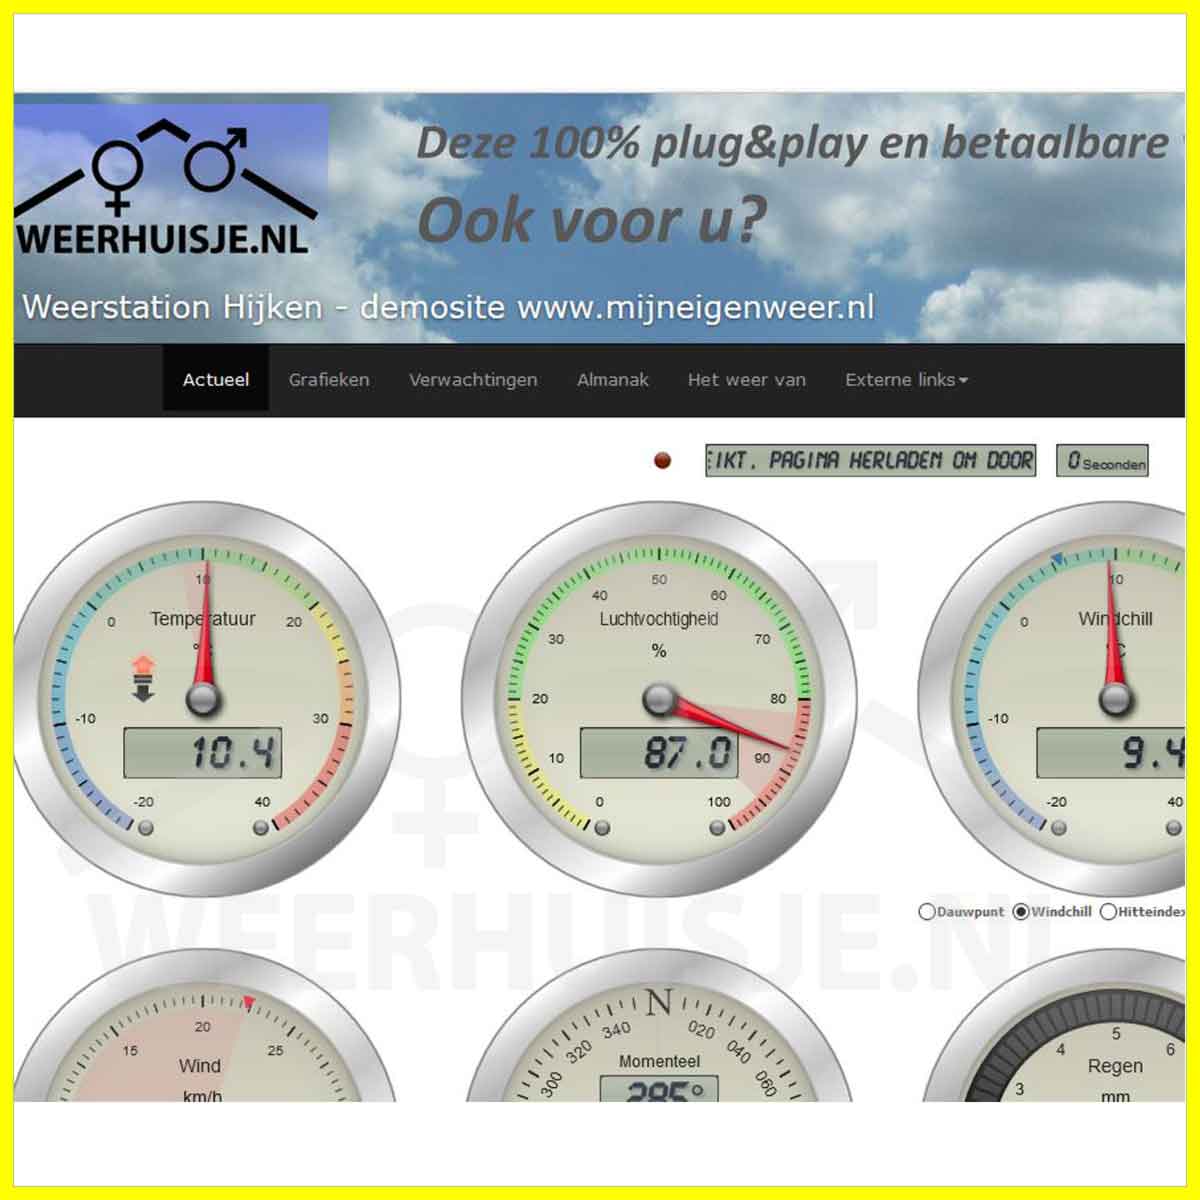
2.3 Your WH-FS-01 particulate matter data on www.myownweather.eu
The myownweather.eu website will soon also support the fine dust measuring station.
- Do you have/or want a weather website at myownweather.eu?
- Your actual particulate matter sensor data is added to the Home page.
- An extra particulate matter graph page shows all the historical details .
- As an example have a look at: www.myownweather.eu/weerstationhijken.
In development:
- You not have a myownweather.eu but would you like to use the extensive graphs? That is also possible. In addition to a complete weather website, it is also possible to use only a particulate matter page.
- Of course, the actual particulate matter data is also shown there.
Pay attention! This functionality is still under development. If you want to know more, mail to info (at) weerhuisje.nl
2.4 Your data on the luftdaten.info map?
Luftdaten.info has a map on which the data from hundreds of stations can be seen.
Do you also want your particulate matter measuring station on the map?
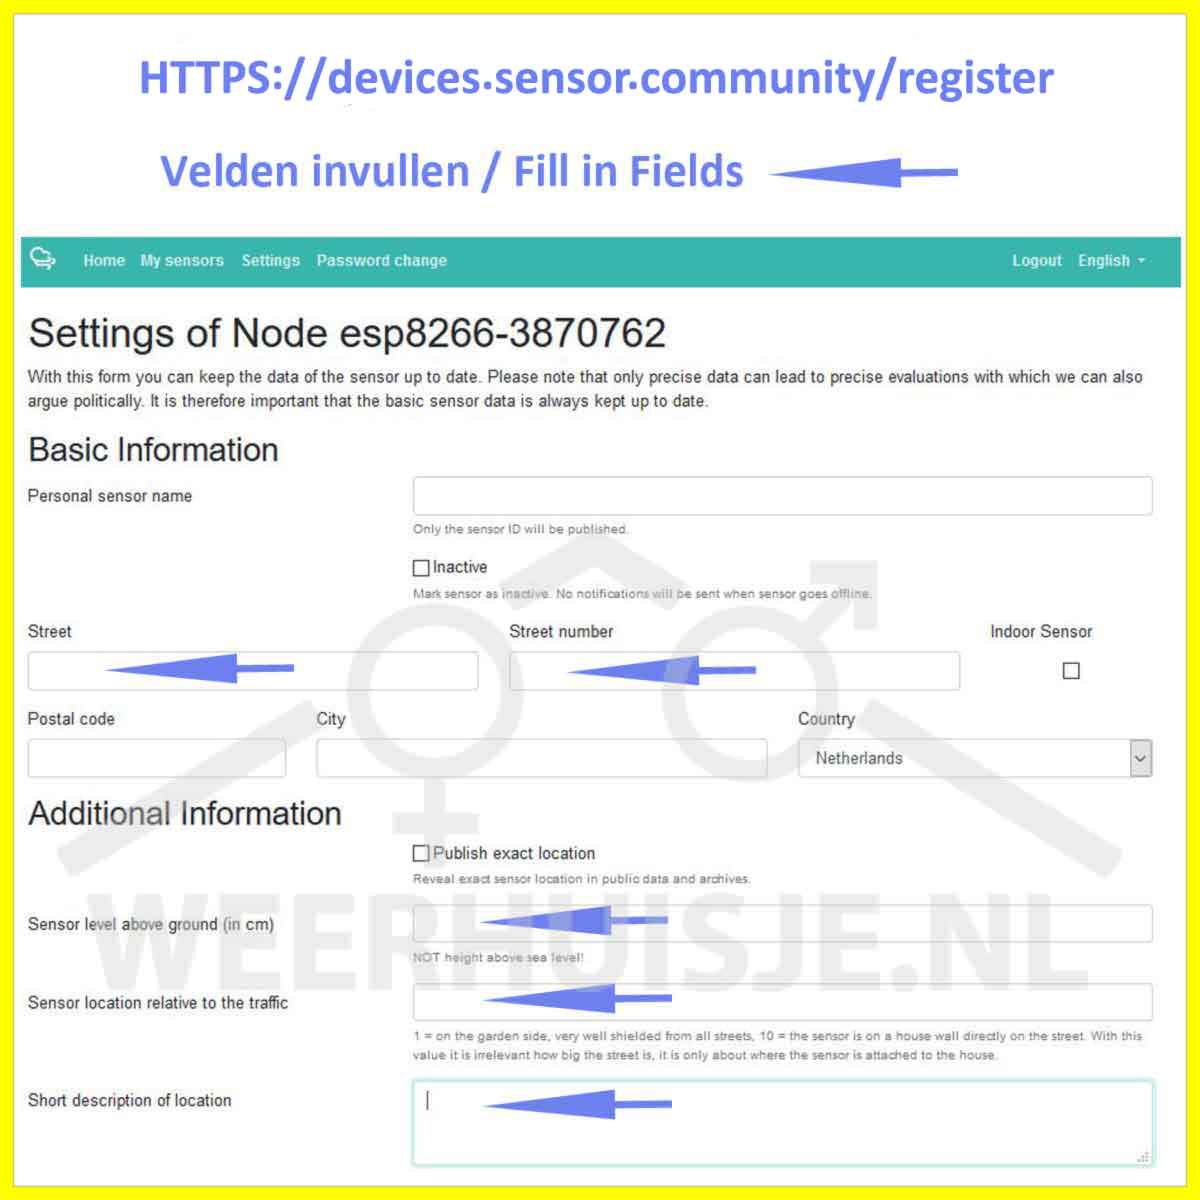
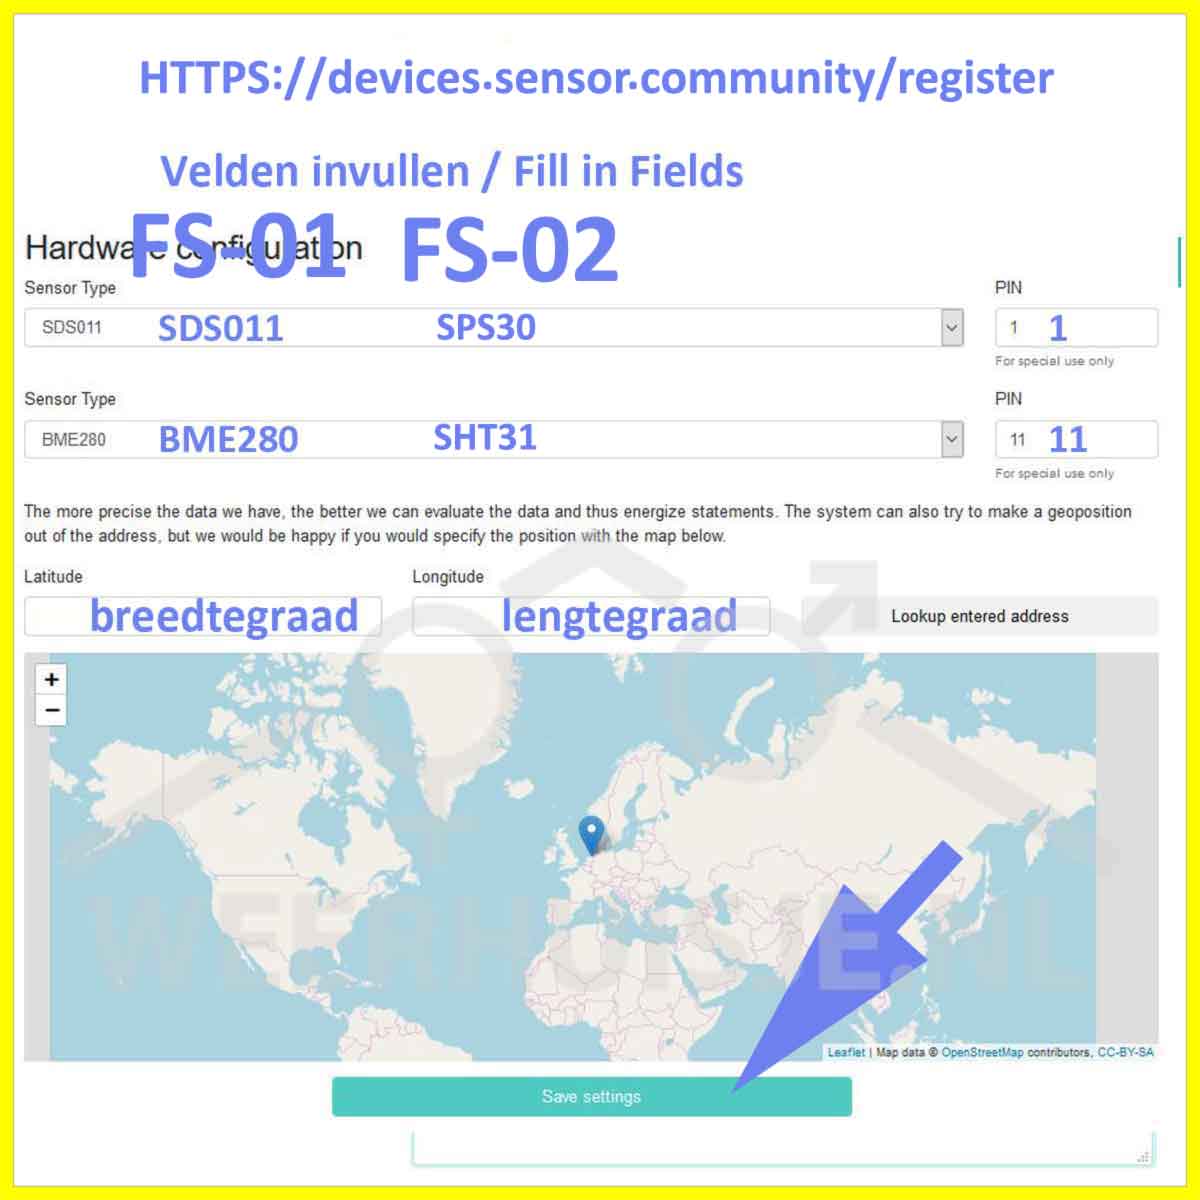
- First register via the meine.luftdaten.info website (see info below).
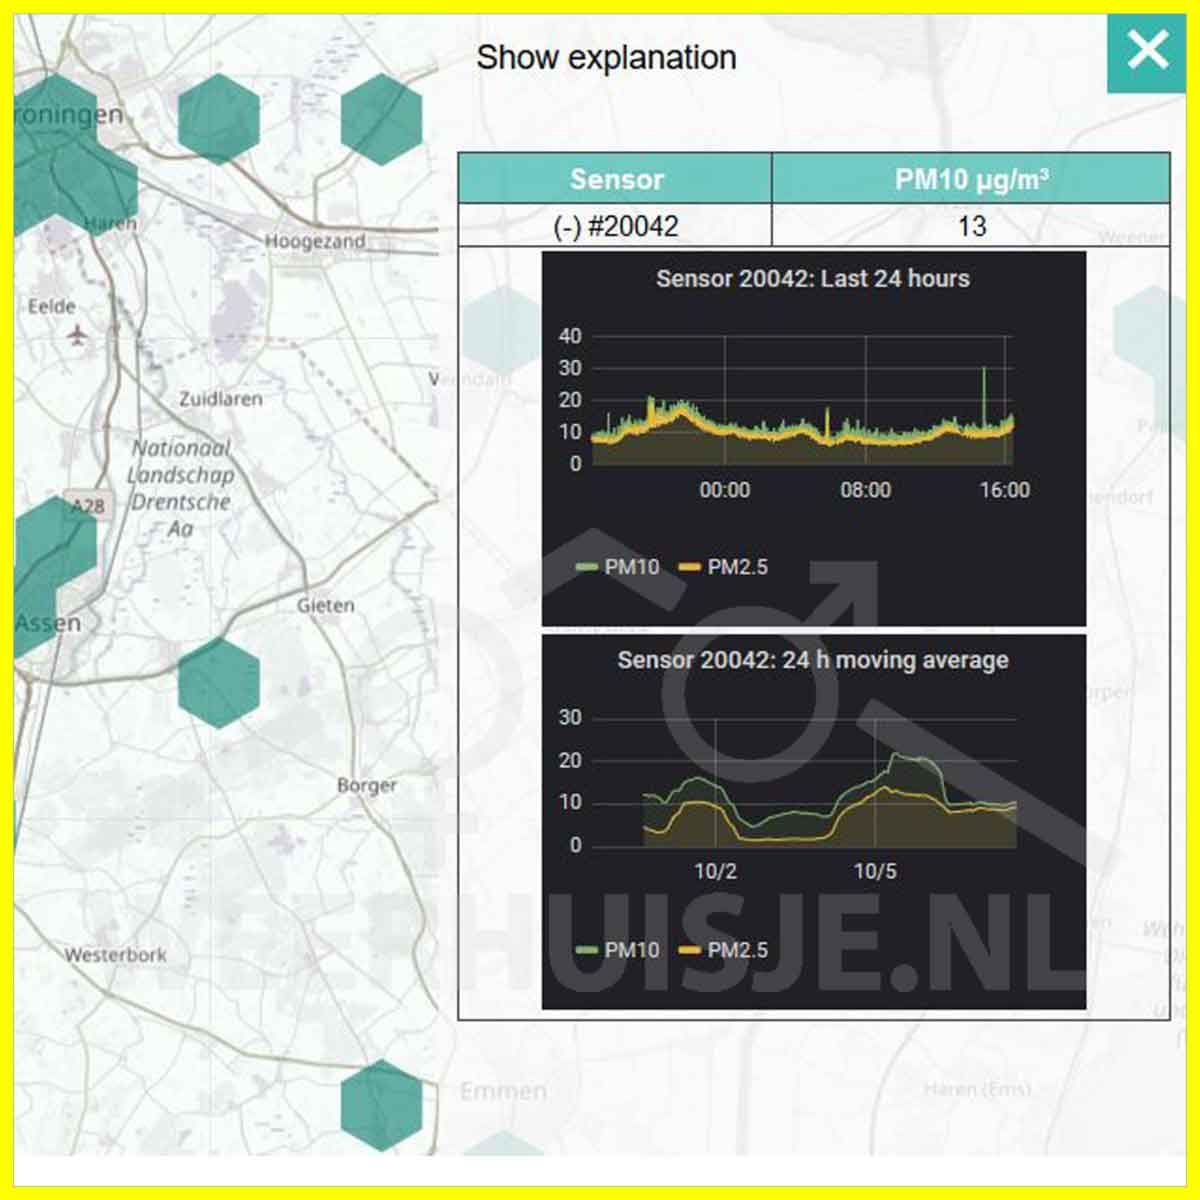
- Find your own station on the map and click on the hexagon. Your current particulate matter data is immediately displayed. Press (+) to display the graphs.
Upper graph:
- Show the last 24 hours of data.
Lower graph:
- Shows the moving 24-hour average over the last 7 days.
2.5a Your particulate matter sensor data shown on the map at www.maps.luftdaten.info
Attention please. Weerhuisje.nl is not affiliated with luftdaten.info. You can register at Luftdaten.info on personal title.
Registration page (see image) via https://meine.luftdaten.info/register
2.5b Your particulate matter sensor data shown on the map at www.maps.luftdaten.info
Attention please. Weerhuisje.nl is not affiliated with luftdaten.info. You can register at Luftdaten.info on personal title.
Registration page (see image) via https://meine.luftdaten.info/register


 Nederlands